< Previous
Next >
2014 -
Mazda6 -
Body and Accessories
KNEE BOLSTER REMOVAL/INSTALLATION
1. Disconnect the negative battery cable. (See NEGATIVE BATTERY CABLE DISCONNECTION/CONNECTION [SKYACTIV-G 2.5].)
2. Remove the following parts: a. Driver-side front scuff plate (See FRONT SCUFF PLATE REMOVAL/INSTALLATION.)
b. Driver-side front side trim (See FRONT SIDE TRIM REMOVAL/INSTALLATION.)
c. Upper panel (See UPPER PANEL REMOVAL/INSTALLATION.)
d. Shift lever knob (MTX) (See MANUAL TRANSAXLE SHIFT MECHANISM REMOVAL/INSTALLATION [C66M-R].)
e. Selector lever knob (ATX) (See AUTOMATIC TRANSAXLE SHIFT MECHANISM REMOVAL/INSTALLATION.)
f. Shift panel (See SHIFT PANEL REMOVAL/INSTALLATION.)
g. Rear console (See REAR CONSOLE REMOVAL/INSTALLATION.)
h. Front console box (See FRONT CONSOLE BOX REMOVAL/INSTALLATION.)
i. Side wall (See SIDE WALL REMOVAL/INSTALLATION.)
j. Front console (See FRONT CONSOLE REMOVAL/INSTALLATION.)
k. Hood release lever (See HOOD LATCH AND RELEASE LEVER REMOVAL/INSTALLATION.)
l. Fuel-filler lid opener lever (See FUEL-FILLER LID OPENER AND LEVER REMOVAL/INSTALLATION.)
m. Driver-side lower panel (See LOWER PANEL REMOVAL/INSTALLATION.)
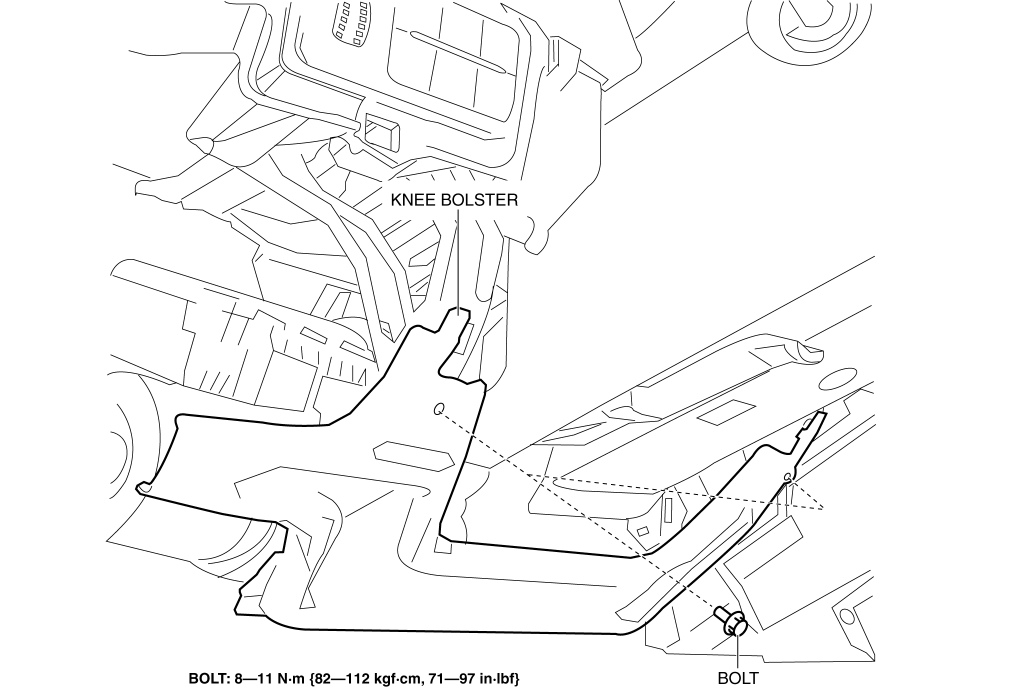
3. Remove the bolts.

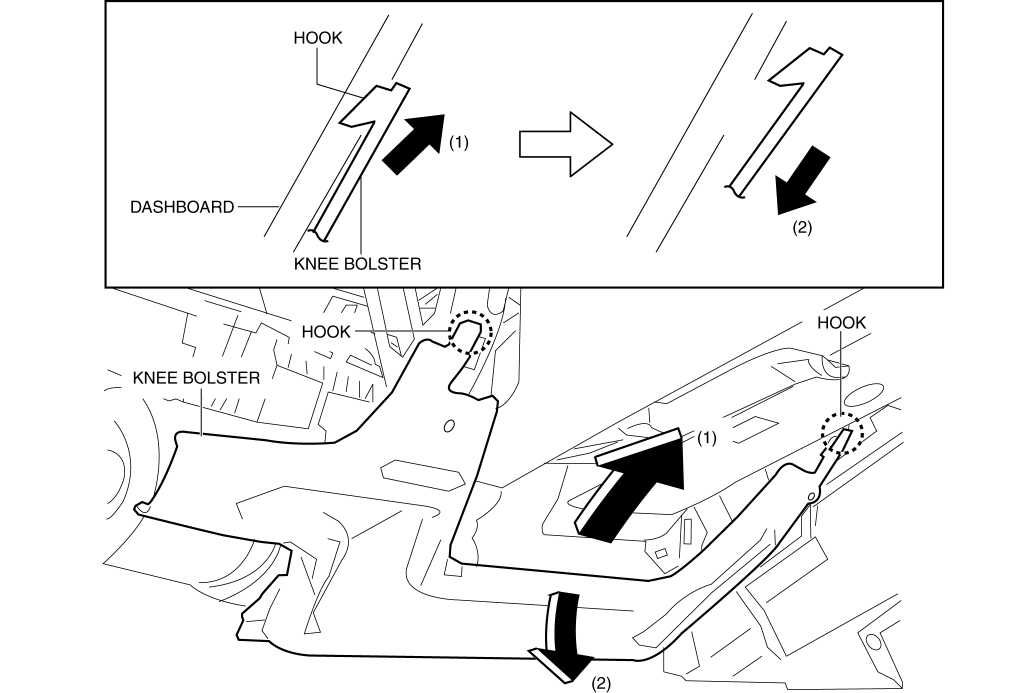
4. Pull the knee bolster in the direction of the arrow in the order of (1), (2) while detaching hooks.

5. Install in the reverse order of removal.
< Previous
Next >
© 2012 Mazda North American Operations, U.S.A.