< Previous
Next >
2014 -
Mazda6 -
Body and Accessories
REAR CONSOLE REMOVAL/INSTALLATION
1. Disconnect the negative battery cable. (See NEGATIVE BATTERY CABLE DISCONNECTION/CONNECTION [SKYACTIV-G 2.5].)
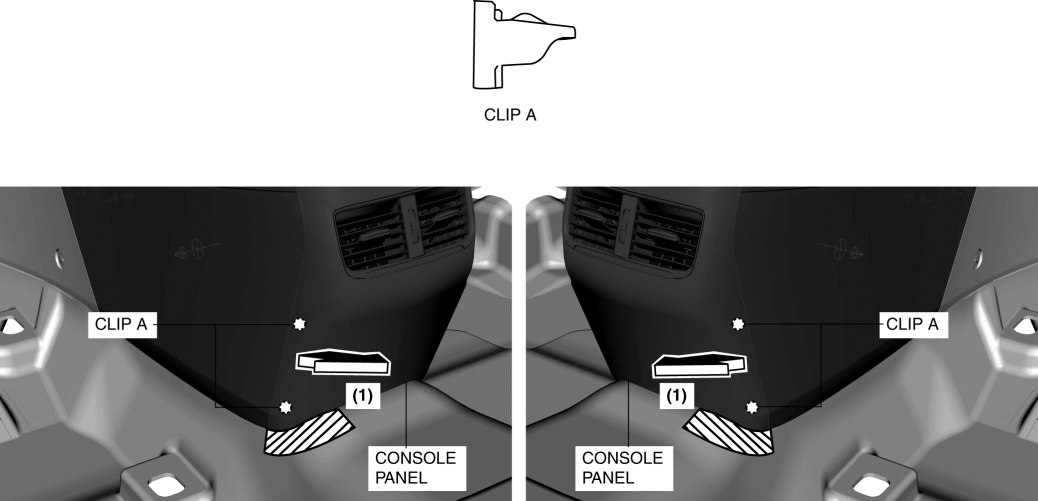
2. Grasp the shaded area shown in the figure, and pull the console panel in the direction of the arrow (1) and remove it while detaching clips A.
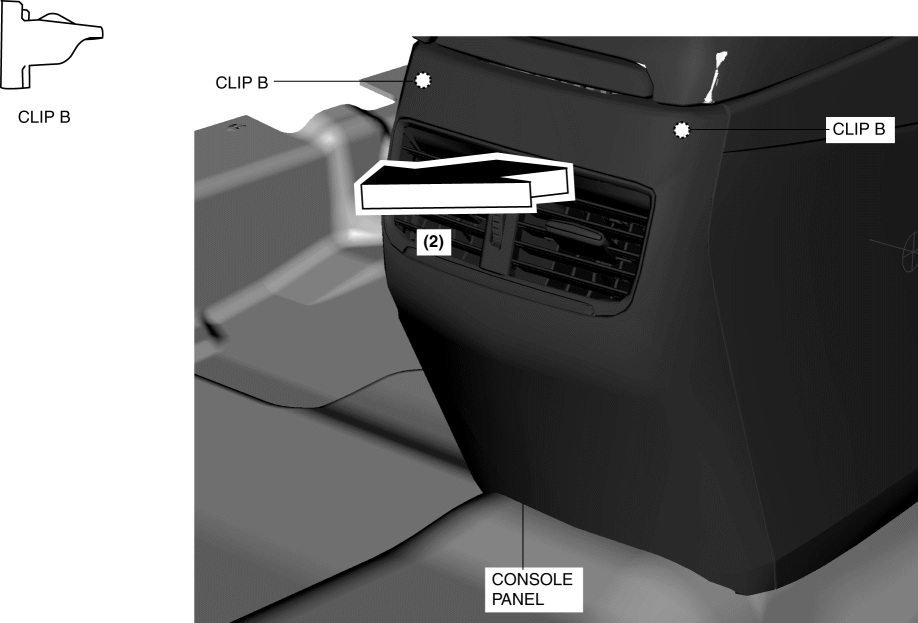
3. Pull the console panel in the direction of the arrow (2) and remove it while detaching clips B.
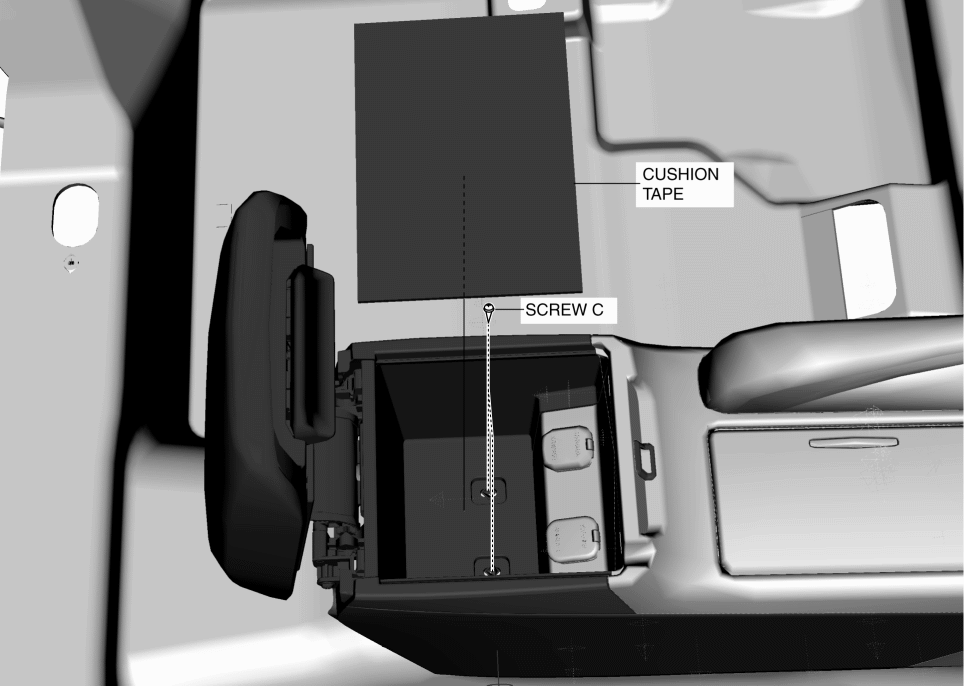
4. Remove the cushion tape, then remove screws C.
5. Remove the upper panel. (See UPPER PANEL REMOVAL/INSTALLATION.)
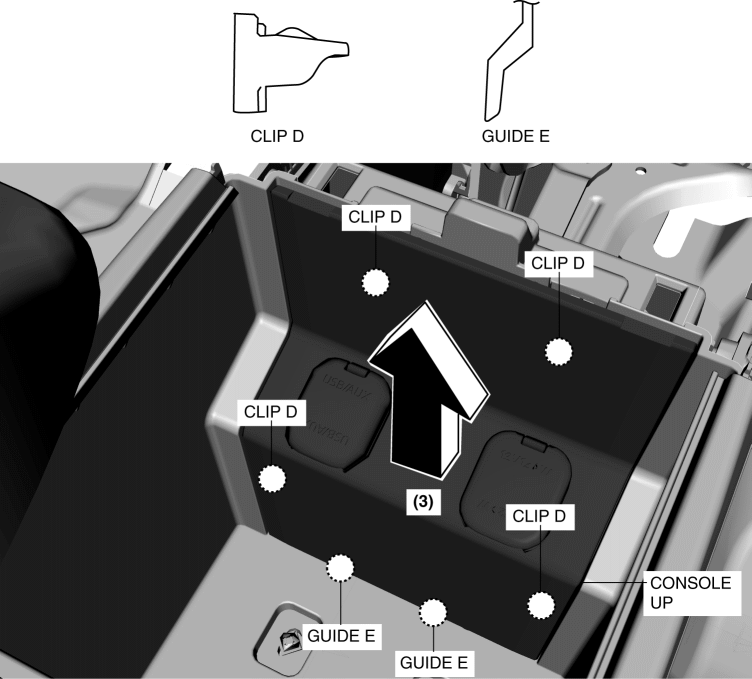
6. Pull the console up in the direction of the arrow (3) and remove it while detaching clips D, guides E.
7. Disconnect the center accessory socket connector and auxiliary jack / USB port connector.
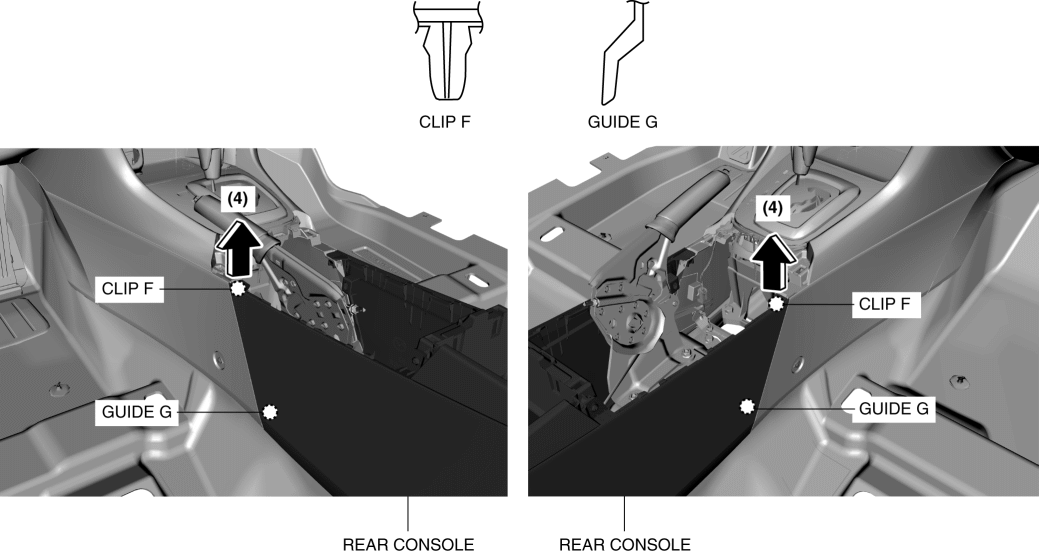
8. Pull the rear console in the direction of the arrow (4) and remove it from the front console while detaching clips F, guides G.
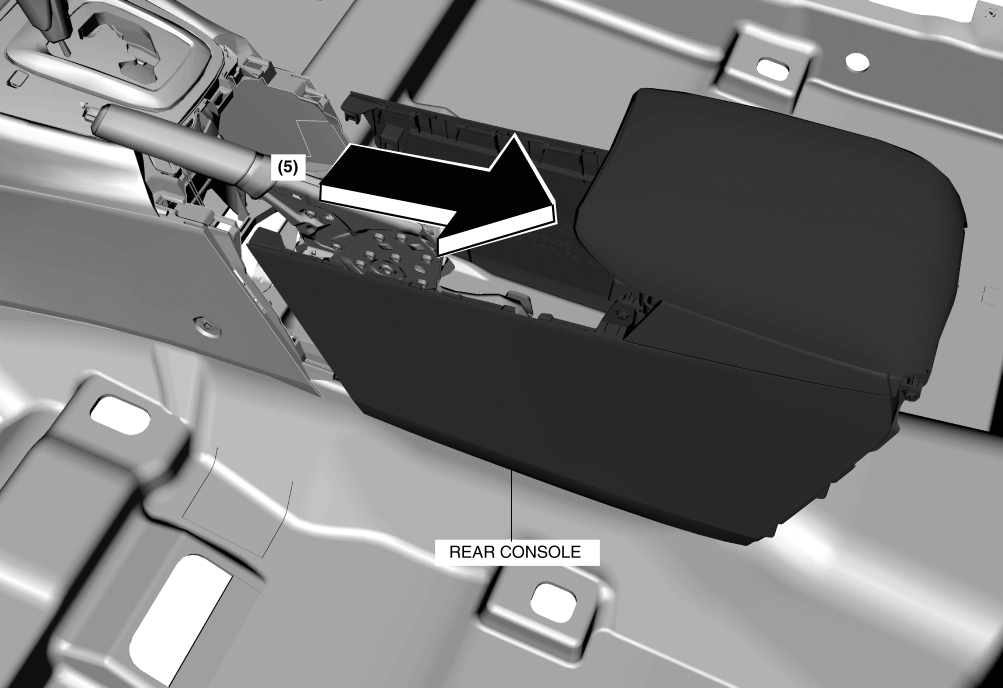
9. Remove the rear console in the direction of the arrow (5) shown in the figure.
10. Install in the reverse order of removal.
< Previous
Next >
© 2012 Mazda North American Operations, U.S.A.