1. Remove the following parts:a. Trunk covering (See TRUNK COVERING REMOVAL/INSTALLATION.)b. Trunk board (See TRUNK BOARD REMOVAL/INSTALLATION.)c. Trunk side pocket (See TRUNK SIDE POCKET REMOVAL/INSTALLATION.)
2. Pull back the trunk side trim (LH) to a position which allows for the removal of the fuel-filler lid opener. (See TRUNK SIDE TRIM REMOVAL/INSTALLATION.)
3. Open the fuel-filler lid.
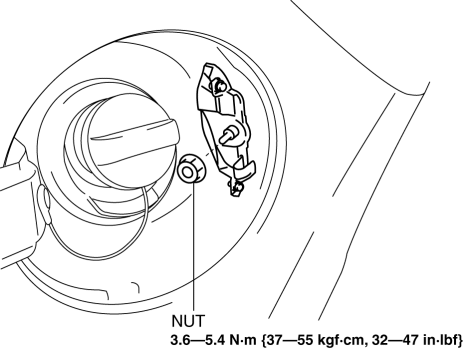
4. Remove the nut.
NOTE:
Perform the following procedure to secure an operation space.
Remove the bolts.
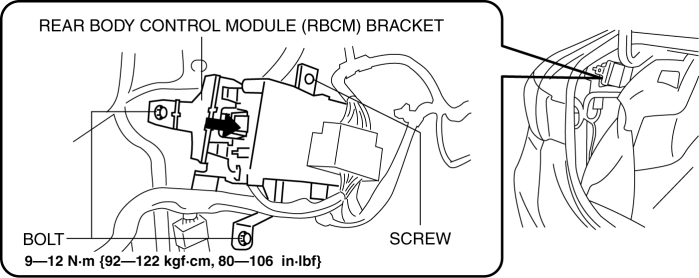
Remove the screw.
Remove the rear body control module (RBCM) bracket from the vehicle body in the direction of the arrow shown in the figure.
5. While pressing the tabs of the stopper bracket in the direction of arrow (1) shown in the figure, press it in the direction of arrow (2) to detach it from the body.
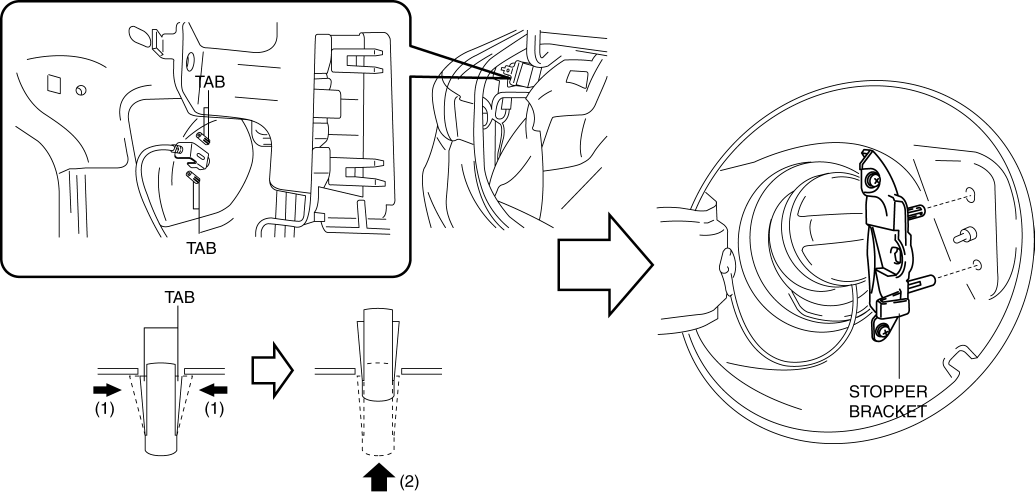
6. Detach all the stopper bracket tabs from the body and remove the stopper bracket.
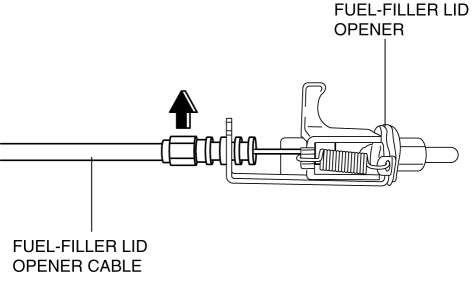
7. Remove the fuel-filler lid opener in the direction of the arrow.
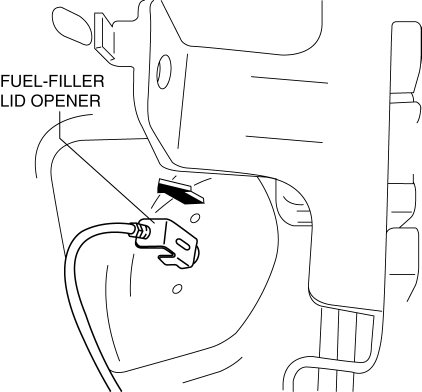
8. Disconnect the fuel-filler lid opener cable from the fuel-filler lid opener.
9. Install in the reverse order of removal.
1. While pulling the fuel-filler lid opener lever, insert a tape-wrapped flathead screwdriver into the position shown in the figure.
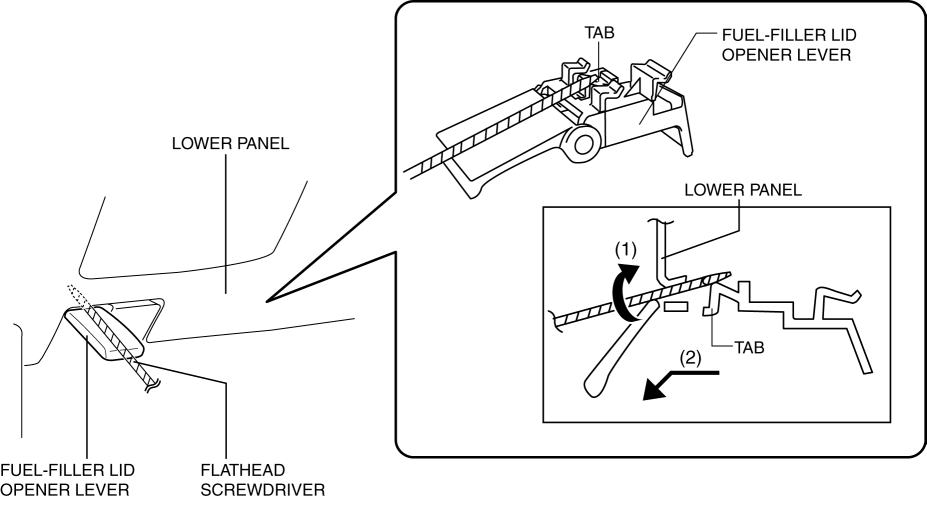
2. Move the tape-wrapped flathead screwdriver in the direction of arrow (1) shown in the figure to press the tab, and pull the fuel-filler lid opener lever in the direction of arrow (2) to detach it from the lower panel.
CAUTION:
Remove the fuel-filler lid opener lever while being careful not to damage the fuel-filler lid opener cable with the flathead screwdriver.
3. Pull the fuel-filler lid opener lever to remove it from the lower panel.
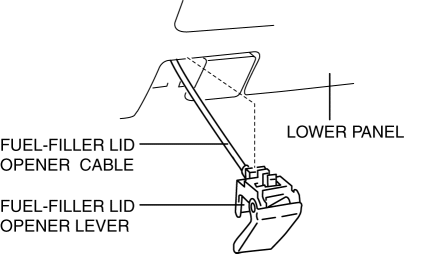
4. Disconnect the fuel-filler lid opener cable from the fuel-filler lid opener lever.
5. Install in the reverse order of removal.