< Previous   Next >

2014 - Mazda6 - Transmission/Transaxle

COUPLER COMPONENT REMOVAL/INSTALLATION [FW6A-EL]

WARNING:

CAUTION:

1. Select the selector lever to P position.
2. Disconnect the negative battery cable. (See NEGATIVE BATTERY CABLE DISCONNECTION/CONNECTION [SKYACTIV-G 2.5].)
3. Remove the front under cover No.2. (See FRONT UNDER COVER No.2 REMOVAL/INSTALLATION.)
4. Clean the transaxle exterior throughout with a steam cleaner or cleaning solvents.
5. Remove the air cleaner component. (See INTAKE-AIR SYSTEM REMOVAL/INSTALLATION [SKYACTIV-G 2.5].)
6. Remove the control valve body. (See CONTROL VALVE BODY REMOVAL/INSTALLATION [FW6A-EL].)
7. Remove the oil seal (control valve body). (See OIL SEAL (CONTROL VALVE BODY) REPLACEMENT [FW6A-EL].)
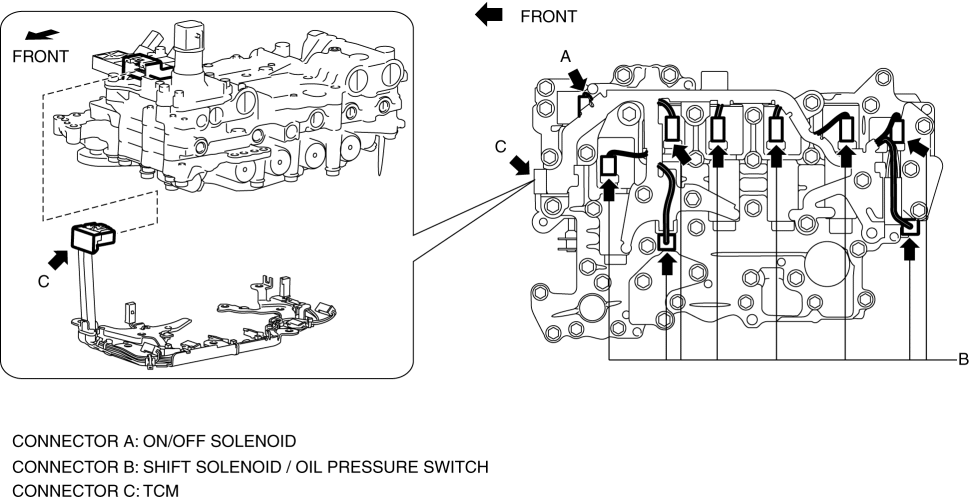
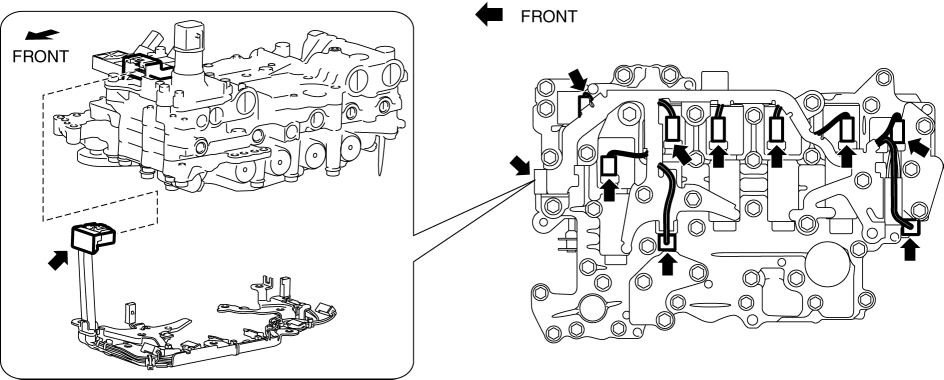
8. Disconnect the coupler component connectors.

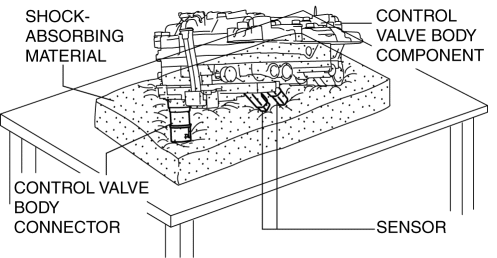
CAUTION:

a. Disconnect connector A and connector C by pressing the connector tab with your fingers.
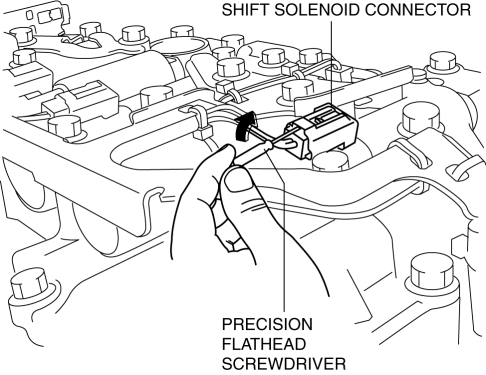
b. Insert a precision flathead screwdriver and move it in the direction of the arrow to disconnect connector B as shown in the figure.

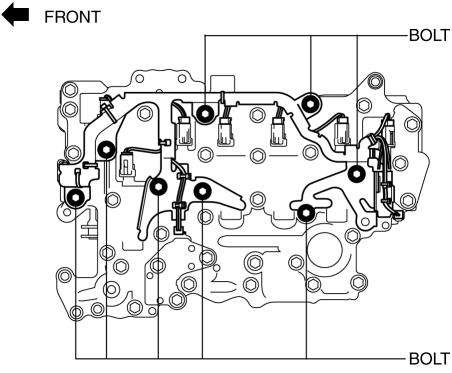
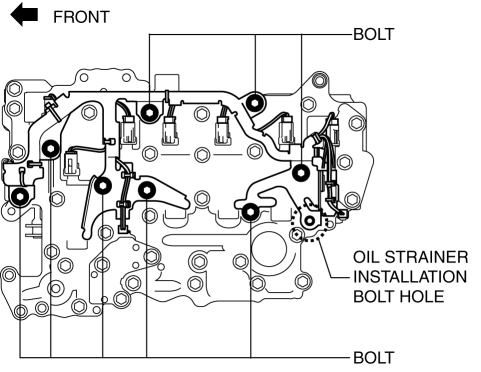
9. Remove the coupler component.

CAUTION:

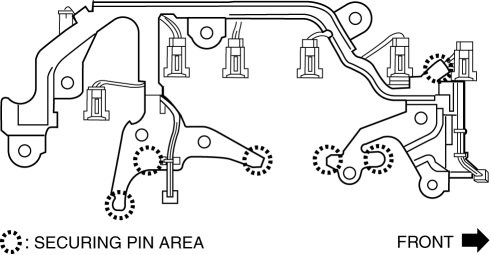
10. Temporarily install the coupler component so that the oil strainer installation bolt hole does not deviate.

11. After verifying that the oil strainer installation bolt hole is not deviated, install the coupler component.

CAUTION:

12. Connect the coupler component connectors.

13. Install the control valve body. (See CONTROL VALVE BODY REMOVAL/INSTALLATION [FW6A-EL].)
14. Install the oil seal (control valve body). (See OIL SEAL (CONTROL VALVE BODY) REPLACEMENT [FW6A-EL].)
15. Install the hose clamp. (See CONTROL VALVE BODY REMOVAL/INSTALLATION [FW6A-EL].)
16. Connect the control valve body connector. (See CONTROL VALVE BODY REMOVAL/INSTALLATION [FW6A-EL].)

CAUTION:

17. Add the ATF. (See AUTOMATIC TRANSAXLE FLUID (ATF) REPLACEMENT [FW6A-EL].)
18. Install the air cleaner component. (See INTAKE-AIR SYSTEM REMOVAL/INSTALLATION [SKYACTIV-G 2.5].)
19. Connect the negative battery cable. (See NEGATIVE BATTERY CABLE DISCONNECTION/CONNECTION [SKYACTIV-G 2.5].)
20. Perform the “Mechanical System Test”. (See MECHANICAL SYSTEM TEST [FW6A-EL].)
21. Install the front under cover No.2. (See FRONT UNDER COVER No.2 REMOVAL/INSTALLATION.)


< Previous   Next >
Back to Top
© 2012 Mazda North American Operations, U.S.A.