CAUTION:
The audio unit communicates with the car-navigation unit and records the presence/non-presence of the car-navigation unit when the ignition is switched to ACC or ON (engine off or on) after connecting the negative battery cable.
If the commander switch is installed with the negative battery cable connected when the audio unit records that there is no car-navigation unit, the car-navigation unit does not operate.
For the car-navigation unit installation/removal, disconnect the negative battery cable, switch the ignition to ACC or ON (engine off or on) after the servicing is completed, and the audio unit records the presence/non-presence of the car-navigation unit.
NOTE:
If the car-navigation unit is replaced with a new one, the information set by the customer is erased because the SD card is also replaced simultaneously. If the same service as before replacing the car-navigation unit is used, the SD card update procedure is required.
If the car-navigation unit is replaced with a new one, explain to the customer and gain their understanding that there is a charge for updating the SD card because payment for downloading paid content is required.
1. Disconnect the negative battery cable. (See NEGATIVE BATTERY CABLE DISCONNECTION/CONNECTION [SKYACTIV-G 2.5].)
2. Remove the pocket lid. (See LOWER PANEL REMOVAL/INSTALLATION.)
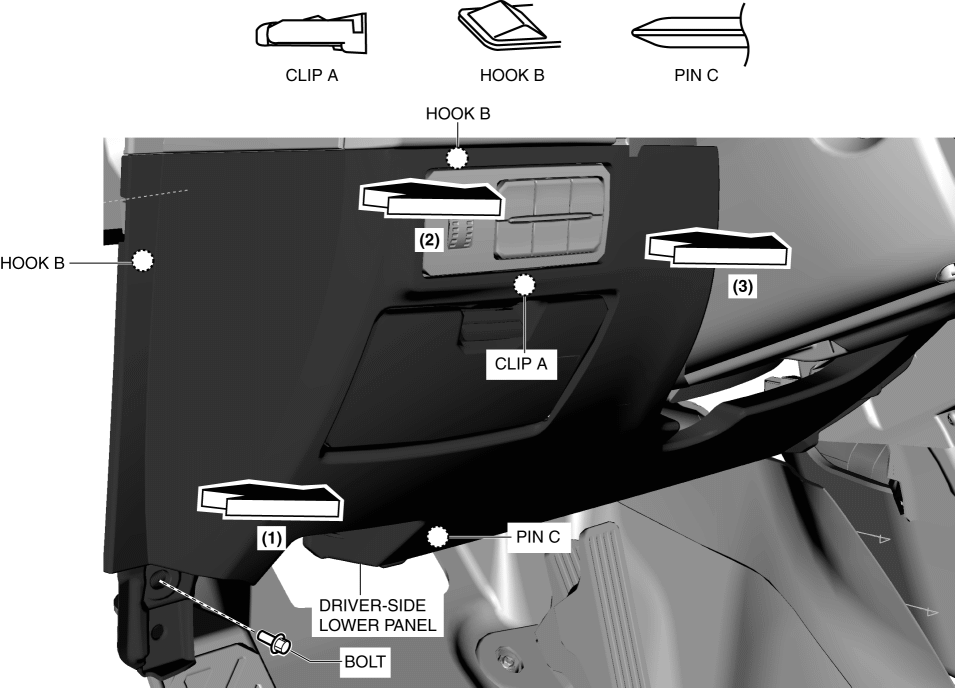
3. Remove the bolt shown in the figure.
4. Pull the driver-side lower panel in the direction of the arrow in the order of (1), (2), (3) while detaching clip A, hooks B and pin C.
5. Partially peel back the driver-side lower panel.
6. While pressing the tabs of clip A in the direction of arrows (1) shown in the figure, press clip A in the direction of arrow (2) to detach it from the car-navigation unit.
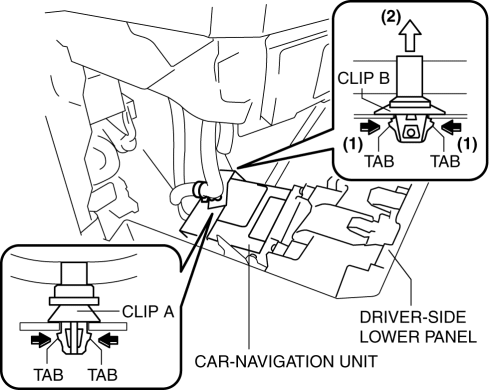
7. Remove the clip A.
8. While pressing the tabs of clip B in the direction of arrows (1) shown in the figure, press clip B in the direction of arrow (2) to detach it from the car-navigation unit.
9. Remove the clip B.
10. Disconnect the connectors.
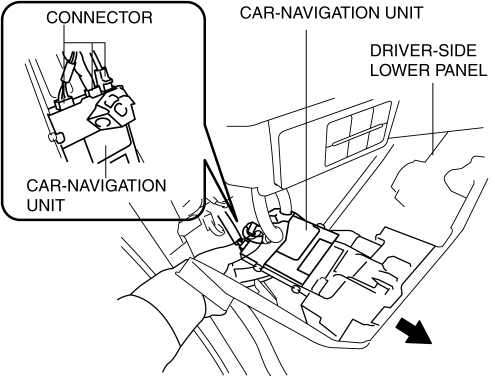
11. Press the car-navigation unit in the direction shown in the figure to detach the clip of the car-navigation unit from the driver-side lower panel.
12. Remove the car-navigation unit.
13. Remove the screws.
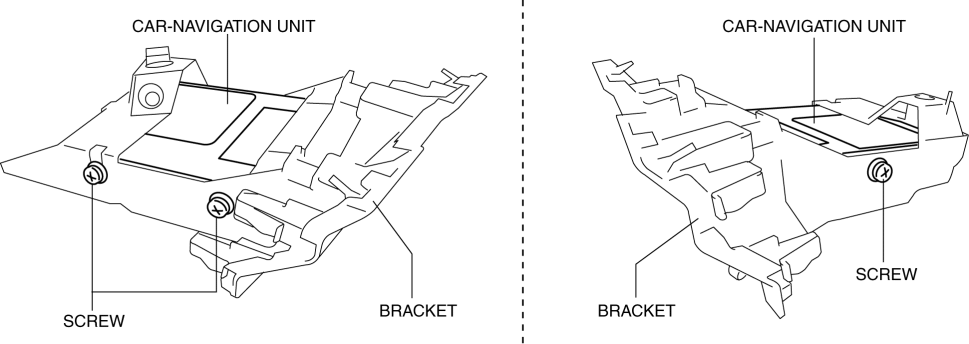
14. Remove the car-navigation unit from bracket.
15. Install in the reverse order of removal. (See Installation Note.)
16. If required, perform updating of the SD card. (See SD CARD UPDATING PROCEDURE.)
Pressing the car-navigation unit when installing it could result in a malfunction. Therefore, press the panel area to install the car-navigation unit.