CAUTION:
When the front combination light is removed from the body, perform the procedure after affixing protective tape to the body. Otherwise, the body could interfere with the front combination light and cause scratching or damage to the body.
WARNING:
Incorrect servicing of the discharge headlights could result in electrical shock. Before servicing the discharge headlights, always refer to the service warnings. (See DISCHARGE HEADLIGHT SERVICE WARNINGS.)
NOTE:
Fogging or condensation on the inside of the front combination lights may occur due to a natural phenomenon occurring as a result of a temperature difference between the interior and exterior of the combination lights. However, it has no effect on the light performance because the temperature inside the front combination lights rises after illuminating the headlights or a period of time has elapsed.
1. Disconnect the negative battery cable. (See NEGATIVE BATTERY CABLE DISCONNECTION/CONNECTION [SKYACTIV-G 2.5].)
2. Remove the front bumper. (See FRONT BUMPER REMOVAL/INSTALLATION.)
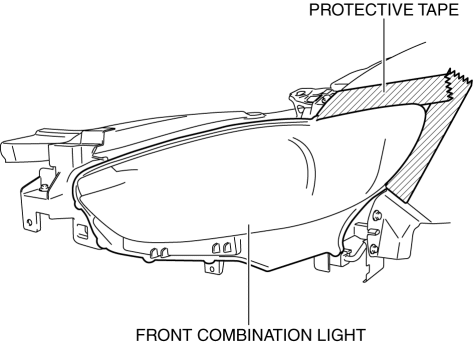
3. To prevent scratches or damage, affix protective tape to the position shown in the figure.CAUTION:
When the front combination light is removed from the body, perform the procedure after affixing protective tape to the body. Otherwise, the body could interfere with the front combination light and cause scratching or damage to the body.
4. Disconnect the connector.
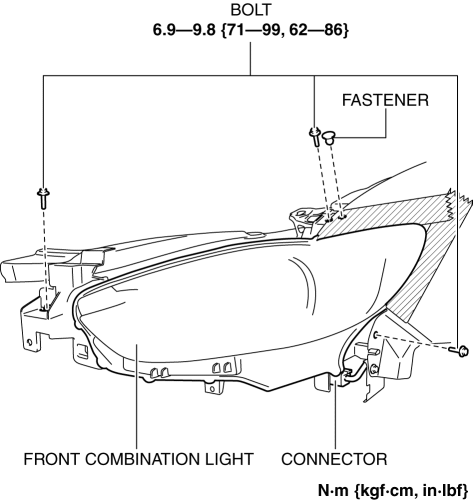
5. Remove the fastener.
6. Remove the bolts.
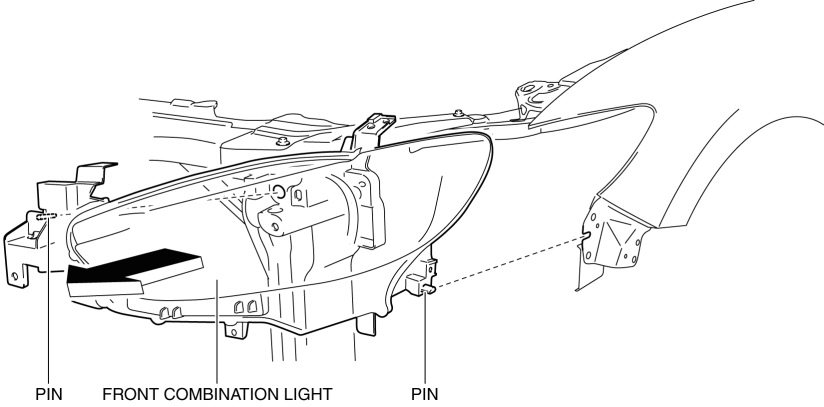
7. Pull the front combination light in the direction of the arrow shown in the figure and pull out the front combination light pins from the body.
8. Remove the front combination light.
9. Install in the reverse order of removal.
10. Adjust the headlight aiming. (See HEADLIGHT AIMING.)