< Previous
Next >
2014 -
Mazda6 -
Body and Accessories
CLUSTER SWITCH REMOVAL/INSTALLATION
1. Disconnect the negative battery cable. (See NEGATIVE BATTERY CABLE DISCONNECTION/CONNECTION [SKYACTIV-G 2.5].)
2. Remove the front scuff plate (See FRONT SCUFF PLATE REMOVAL/INSTALLATION.)
3. Remove the front side trim (See FRONT SIDE TRIM REMOVAL/INSTALLATION.)
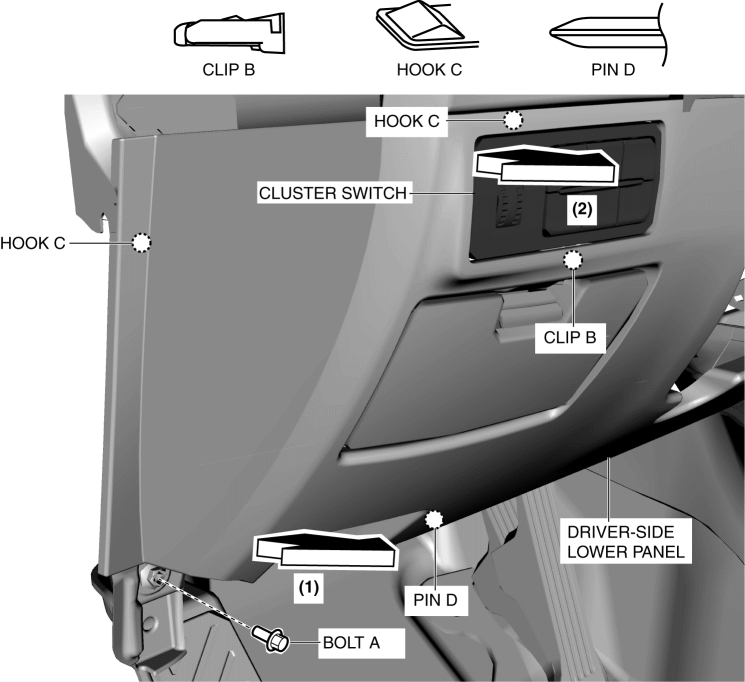
4. Remove bolt A.

5. Pull the driver-side lower panel in the direction of the arrow in the order of (1), (2) while detaching clip B, hooks C and pin D.
6. Set the driver-side lower panel aside.
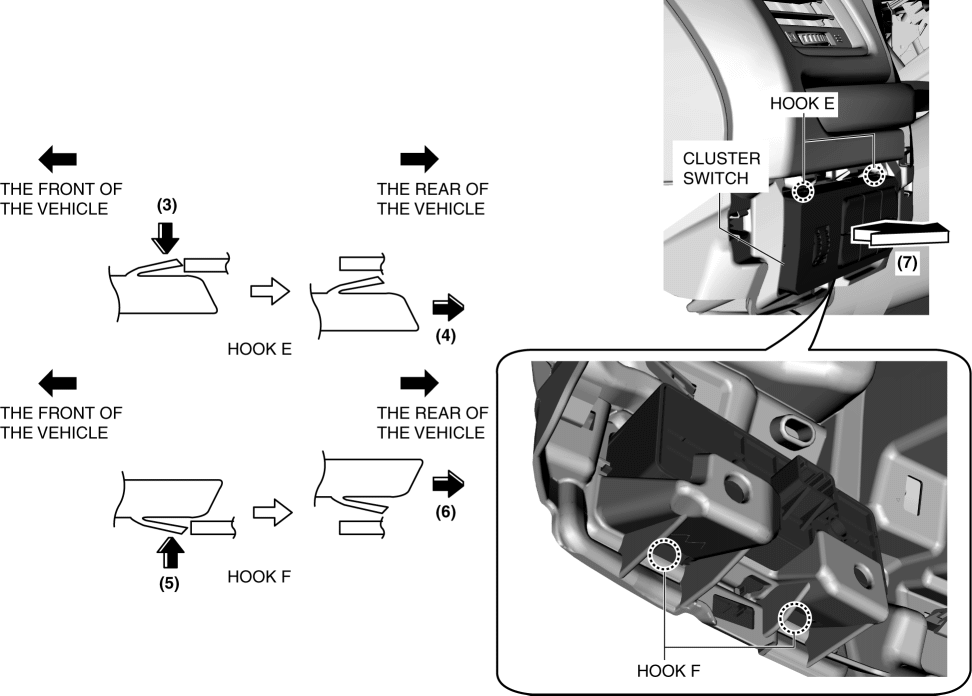
7. Remove hooks E in the direction of the arrow in the order of (3), (4) shown in the figure.

8. Remove hooks F in the direction of the arrow in the order of (5), (6) shown in the figure.
9. Remove the cluster switch in the direction of the arrow (7) shown in the figure.
10. Disconnect the cluster switch connector.
11. Install in the reverse order of removal.
< Previous
Next >
© 2012 Mazda North American Operations, U.S.A.