1. Fully lower the front door glass.
2. Disconnect the negative battery cable. (See NEGATIVE BATTERY CABLE DISCONNECTION/CONNECTION [SKYACTIV-G 2.5].)
3. Remove the inner garnish. (See INNER GARNISH REMOVAL/INSTALLATION.)
4. Remove the front door trim. (See FRONT DOOR TRIM REMOVAL/INSTALLATION.)
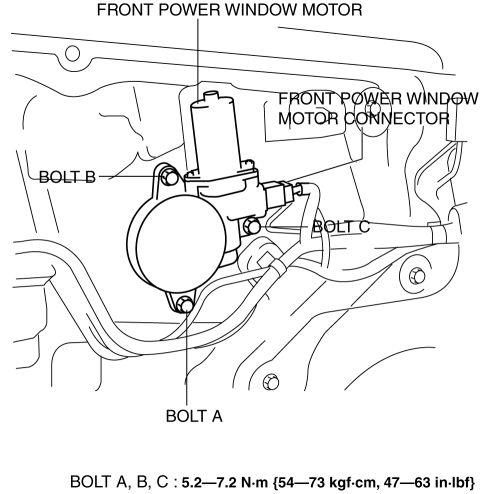
5. Disconnect the front power window motor connector.
6. Remove bolt A.
7. Remove bolt B.
8. Remove bolt C.
9. Remove the front power window motor.
10. Install in the reverse order of removal.NOTE:
When installing the power window motor to the power window regulator drum, the drum housing tab may come off the door unit. If this happens, remove the door speaker, insert your hand in the speaker installation hole, connect the drum housing tabs, and while supporting the drum housing, install the power window motor to the drum.
1. Fully lower the rear door glass.
2. Disconnect the negative battery cable. (See NEGATIVE BATTERY CABLE DISCONNECTION/CONNECTION [SKYACTIV-G 2.5].)
3. Remove the rear door trim. (See REAR DOOR TRIM REMOVAL/INSTALLATION.)
4. Disconnect the rear power window motor connector.
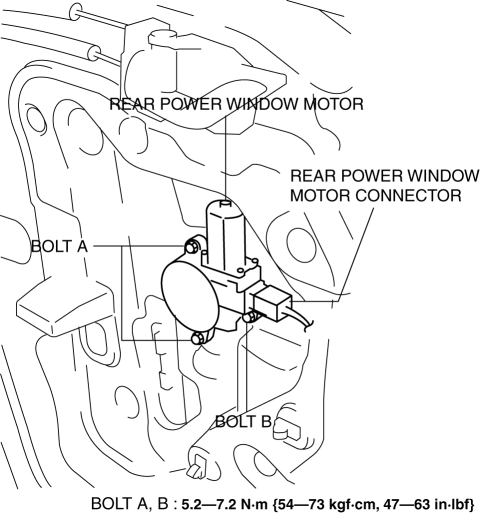
5. Remove bolts A.
6. Remove bolt B.
7. Remove the rear power window motor.
8. Install in the reverse order of removal.NOTE:
When installing the power window motor to the power window regulator drum, the drum housing tab may come off the door unit. If this happens, remove the door speaker, insert your hand in the speaker installation hole, connect the drum housing tabs, and while supporting the drum housing, install the power window motor to the drum.