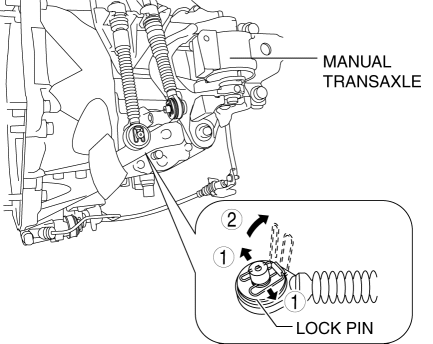
a. Pull the lock pin in the direction of the arrow shown in the figure and release the control cable end lock.
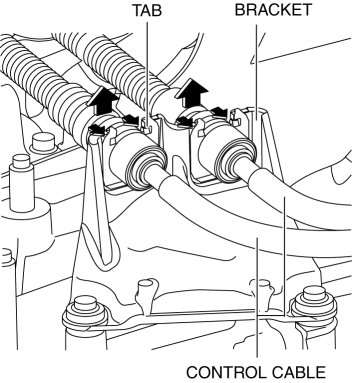
b. Press the tabs on the control cable and disconnect the control cable from the bracket on the manual transaxle.
1. Shift the shift lever to the neutral position.
2. Remove the plug hole plate. (See PLUG HOLE PLATE REMOVAL/INSTALLATION [SKYACTIV-G 2.5].)
3. Disconnect the negative battery cable. (See NEGATIVE BATTERY CABLE DISCONNECTION/CONNECTION [SKYACTIV-G 2.5].)
4. Remove the air cleaner and air hose as a single unit. (See INTAKE-AIR SYSTEM REMOVAL/INSTALLATION [SKYACTIV-G 2.5].)
5. Remove the battery and battery tray. (See BATTERY REMOVAL/INSTALLATION [SKYACTIV-G 2.5].)
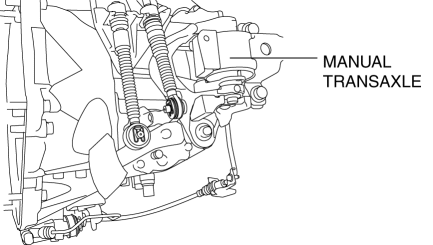
6. Disconnect the control cable from the manual transaxle.a. Pull the lock pin in the direction of the arrow shown in the figure and release the control cable end lock.
b. Press the tabs on the control cable and disconnect the control cable from the bracket on the manual transaxle.
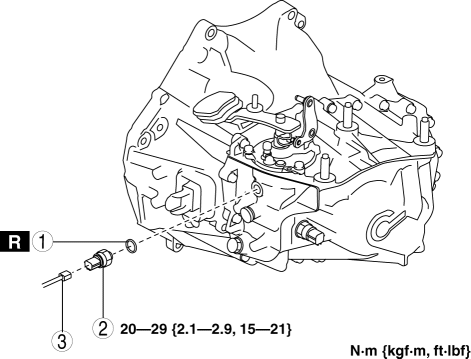
7. Remove the neutral switch in the order shown in the figure.
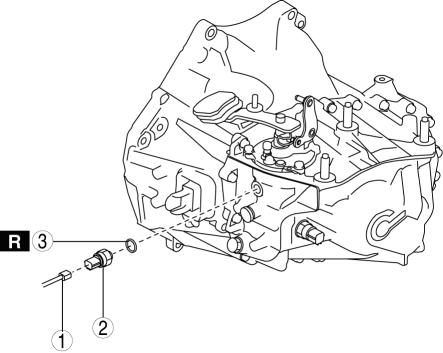
1
Connector
2
Neutral switch
3
Gasket
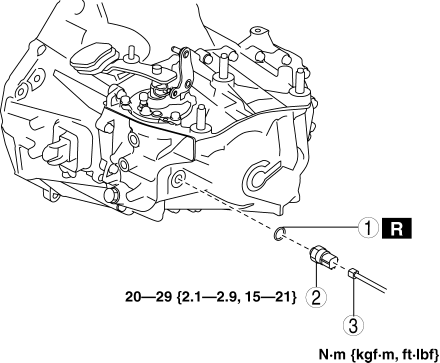
8. Remove the detent ball pin in the order shown in the figure.
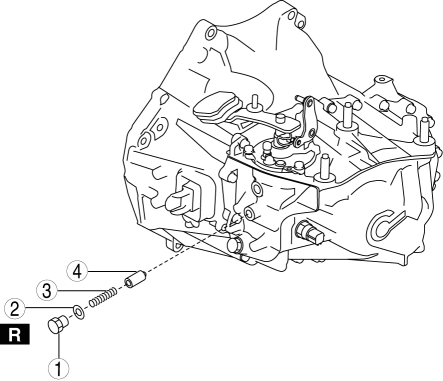
1
Plug
2
Gasket
3
Spring
4
Detent ball pin
9. Remove the back-up light switch in the order shown in the figure.
1
Connector
2
Back-up light switch
3
Gasket
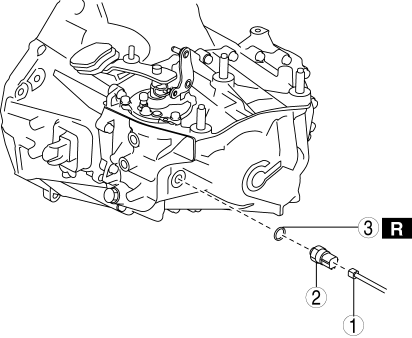
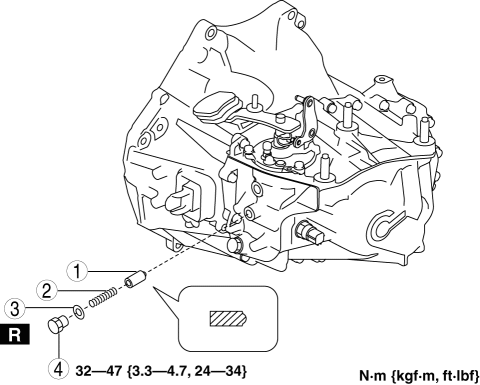
10. Remove the shift control module in the order shown in the figure.
1
Breather
2
Shift control module
3
O-ring
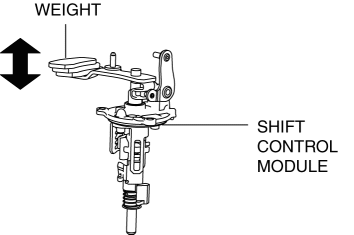
1. Verify that the shift control module is in the neutral position.NOTE:
If the shift control module is in the neutral position, the shift lever with the weight can be moved up and down to a large extent.
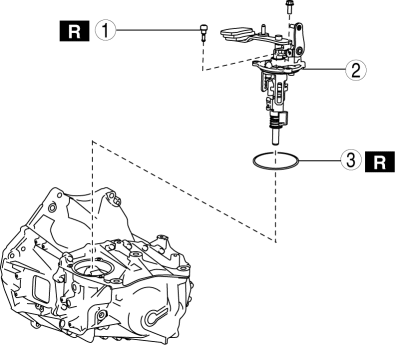
2. Install the shift control module in the order shown in the figure.
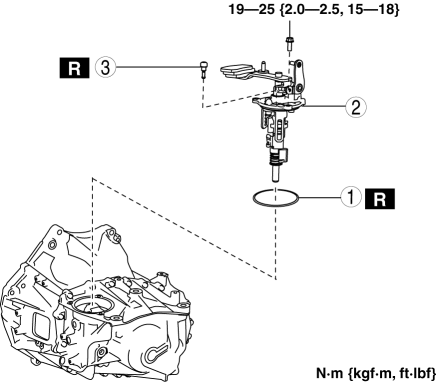
1
O-ring
2
Shift control module
3
Breather
3. Install the back-up light switch in the order shown in the figure.
1
Gasket
2
Back-up light switch
3
Connector
4. Install the detent ball pin in the order shown in the figure.
1
Detent ball pin
2
Spring
3
Gasket
4
Plug
5. Install the neutral switch in the order shown in the figure.
1
Gasket
2
Neutral switch
3
Connector
6. Connect the control cable to the manual transaxle.
7. Make sure that the shift lever can be shifted smoothly.
8. Install the battery tray and battery. (See BATTERY REMOVAL/INSTALLATION [SKYACTIV-G 2.5].)
9. Install the air cleaner and air hose as a single unit. (See INTAKE-AIR SYSTEM REMOVAL/INSTALLATION [SKYACTIV-G 2.5].)
10. Connect the negative battery cable. (See NEGATIVE BATTERY CABLE DISCONNECTION/CONNECTION [SKYACTIV-G 2.5].)
11. Install the plug hole plate. (See PLUG HOLE PLATE REMOVAL/INSTALLATION [SKYACTIV-G 2.5].)