If it is not as specified, find the cause and repair or replace the applicable part.
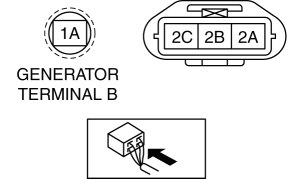
Generator standard voltage [IG-ON]
Terminal 1A: Capacitor voltage
Terminal 2A: Approx. 1.0 V
Terminal 2B: Approx. 1.0 V
Terminal 2C: B+
Generator standard voltage [Idle, 20 °C {68 °F}]
Terminal 1A: Capacitor voltage
Terminal 2A, 2B: Turn the electrical loads (headlights, blower motor, rear window defroster, brake lights, etc.) on and verify that the voltage reading increases.
Terminal 2C: B+