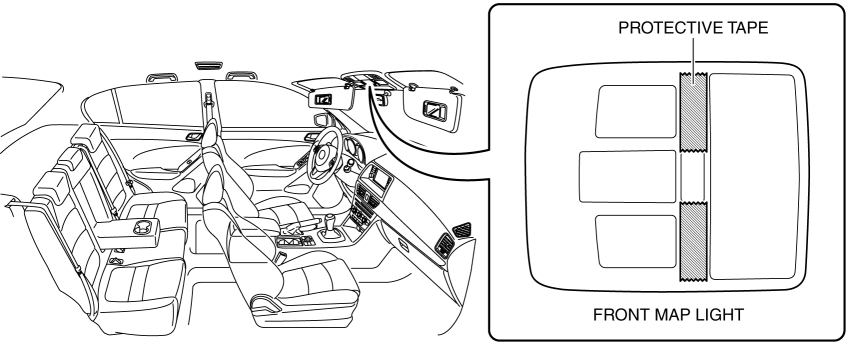
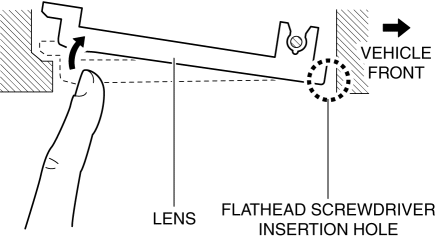
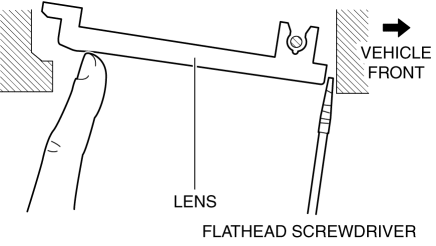
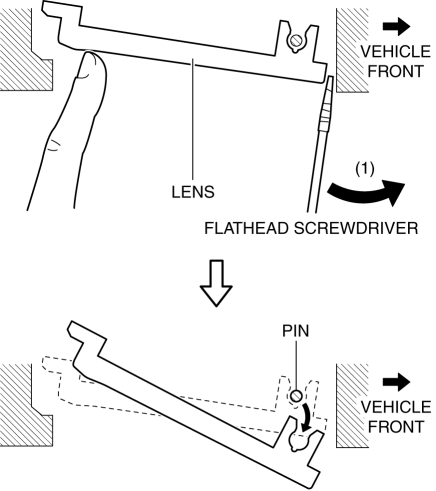
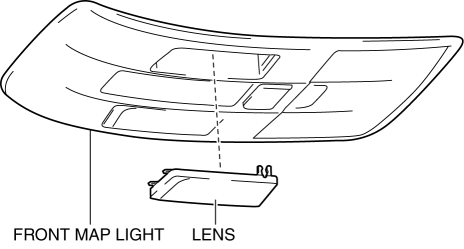
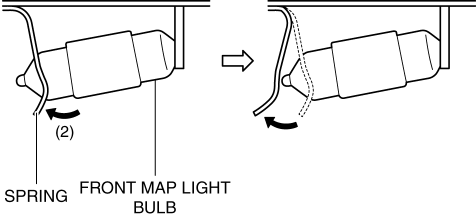
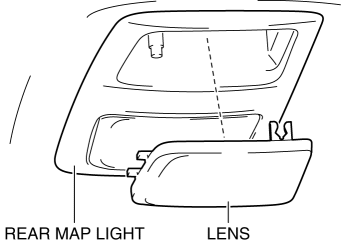
< Previous   Next >

2014 - Mazda6 - Body and Accessories

MAP LIGHT BULB REMOVAL/INSTALLATION

Front Map Light

1. Disconnect the negative battery cable. (See NEGATIVE BATTERY CABLE DISCONNECTION/CONNECTION [SKYACTIV-G 2.5].)
2. To prevent scratches or damage, affix protective tape to the position shown in the figure.

CAUTION:

3. Press the lens to secure a sufficient space for inserting a flathead screwdriver.

4. Insert a tape-wrapped flathead screwdriver into the gap between the lens and front map light shown in the figure.

5. Move the flathead screwdriver in the direction of the arrow (1) shown in the figure, and pull out the lens from the front map light to detach the front map light pin from the lens.

6. Remove the lens.

7. Press the front map light spring in the direction of the arrow (2) shown in the figure to detach the front map light spring from the front map light bulb.

8. Remove the front map light bulb.

9. Install in the reverse order of removal.

Rear Map Light

1. Disconnect the negative battery cable. (See NEGATIVE BATTERY CABLE DISCONNECTION/CONNECTION [SKYACTIV-G 2.5].)
2. To prevent scratches or damage, affix protective tape to the position shown in the figure.

CAUTION:

3. Press the lens to secure a sufficient space for inserting a flathead screwdriver.

4. Insert a tape-wrapped flathead screwdriver into the gap between the lens and rear map light shown in the figure.

5. Move the flathead screwdriver in the direction of the arrow (1) shown in the figure, and pull out the lens from the rear map light to detach the rear map light pin from lens.

6. Remove the lens.

7. Move the rear map light spring in the direction of the arrows (2) shown in the figure to detach the rear map light spring from the rear map light bulb.

8. Remove the rear map light bulb.

9. Install in the reverse order of removal.


< Previous   Next >
Back to Top
© 2012 Mazda North American Operations, U.S.A.