-
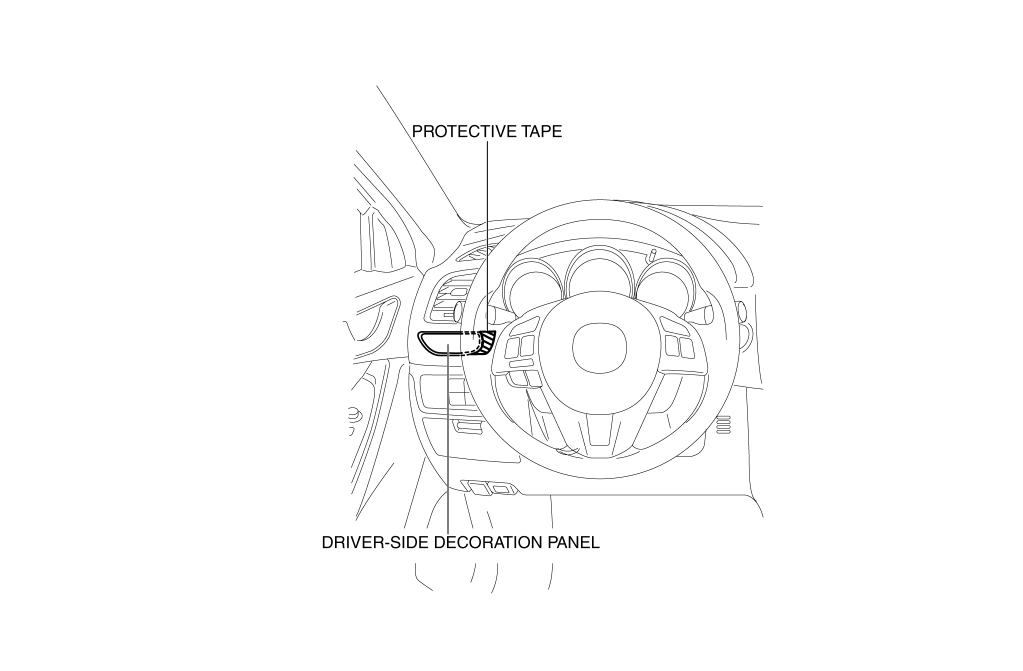
Affix protective tape to the position shown in the figure.
CAUTION:
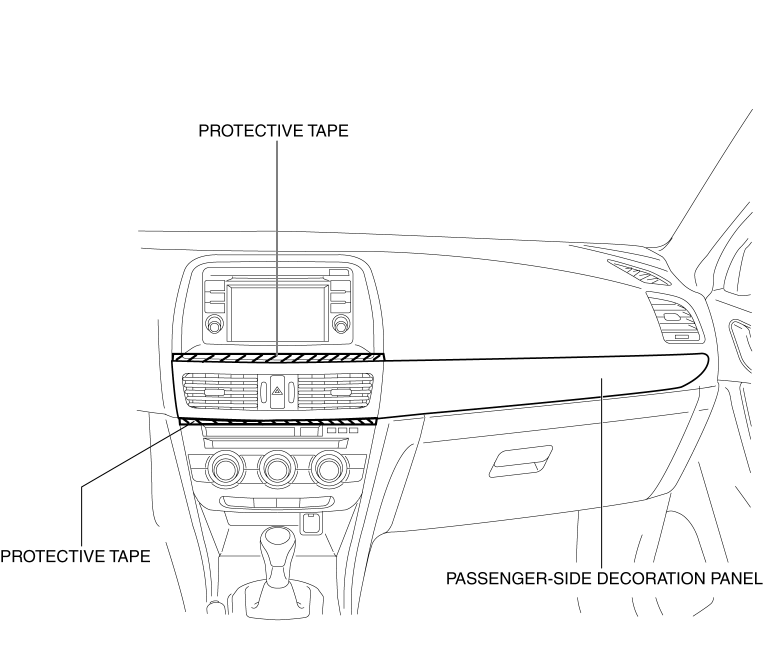
Affix protective tape to the position shown in the figure.
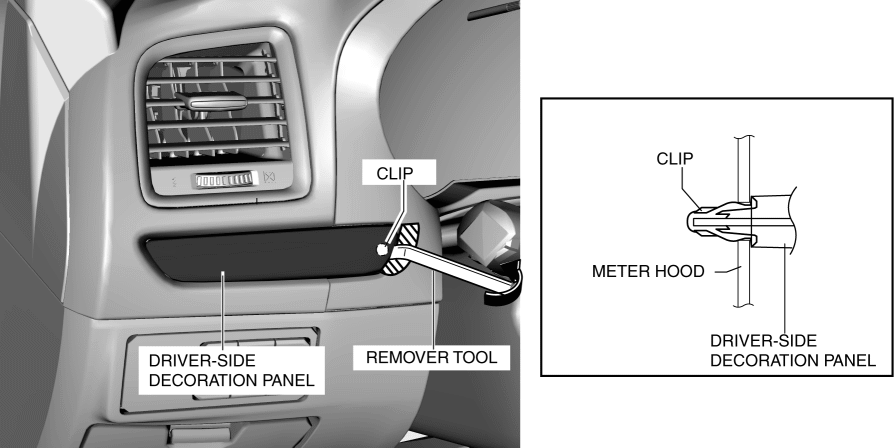
1. Insert the remover tool into the position shown in the figure.
2. Move the remover tool in the direction of arrow shown in the figure, and detach clip form the meter hood.
3. Move the driver-side decoration panel in the direction of arrow shown in the figure, and detach guide from the dashboard.
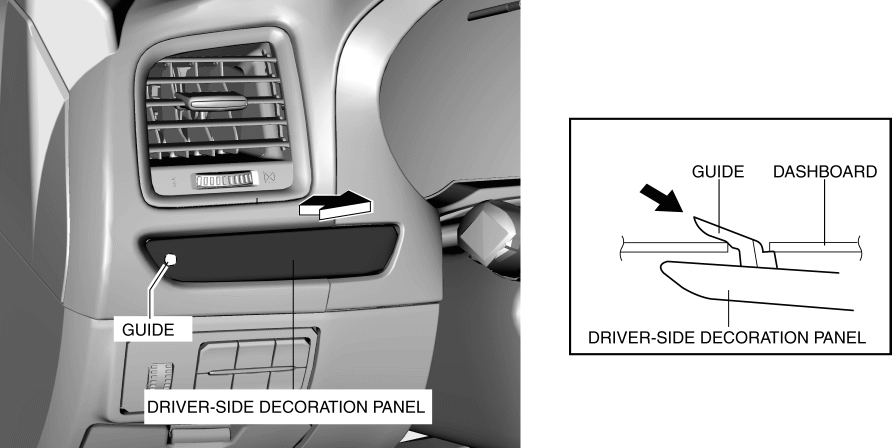
4. Remove the driver-side decoration panel.
5. Install in the reverse order of removal.
CAUTION:
Affix protective tape to the position shown in the figure.
1. Disconnect the negative battery cable. (See NEGATIVE BATTERY CABLE DISCONNECTION/CONNECTION [SKYACTIV-G 2.5].)
2. Remove the upper column cover. (See COLUMN COVER REMOVAL/INSTALLATION.)
3. Remove the meter hood. (See METER HOOD REMOVAL/INSTALLATION.)
4. Remove the glove compartment. (See GLOVE COMPARTMENT REMOVAL/INSTALLATION.)
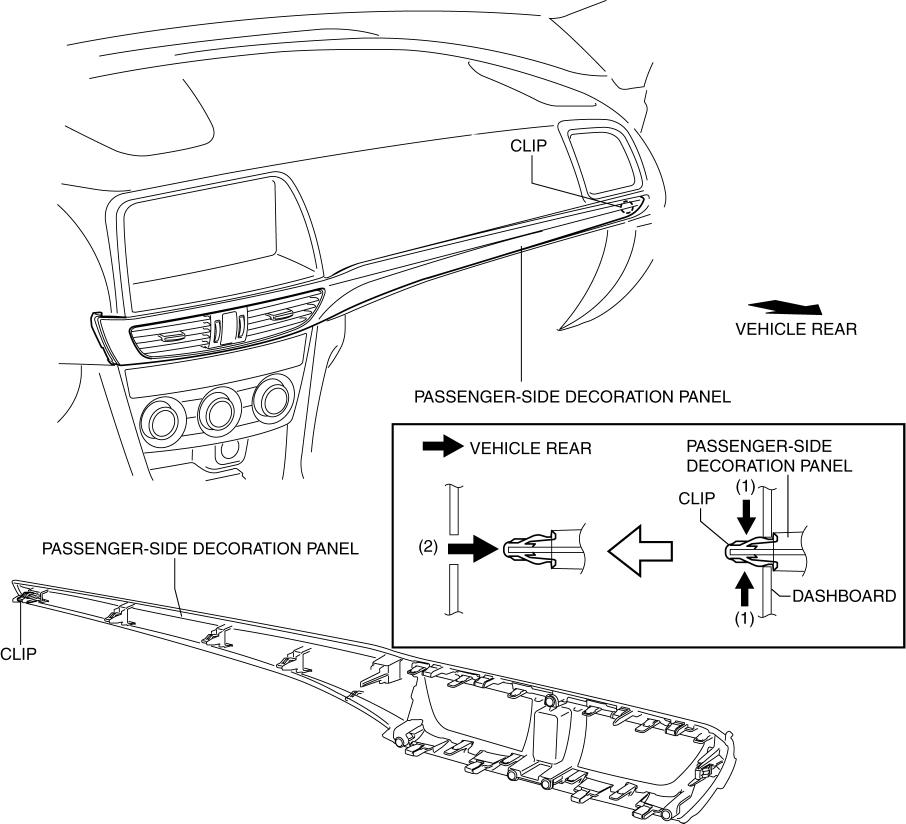
5. While pressing the clip tabs in the direction of arrows (1) shown in the figure, press the clip in the direction of arrow (2) to detach the clip from the dashboard.
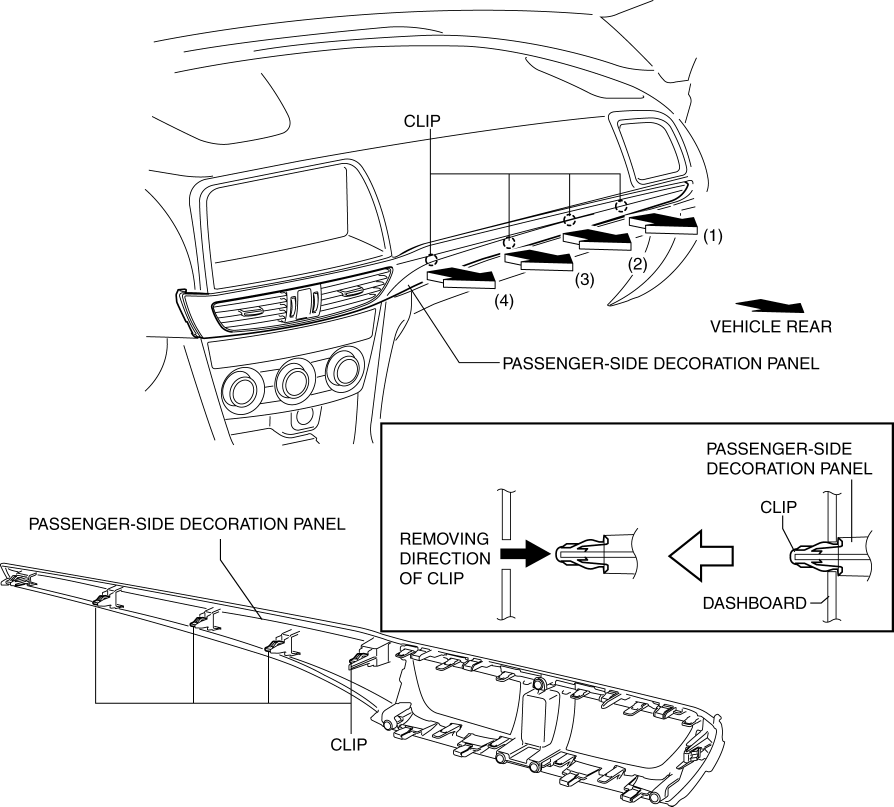
6. Insert your fingers into the gap between the decoration panel and the dashboard, and while pulling the decoration panel straight toward the vehicle rear in the order of arrows (1), (2, (3), and (4), and detach clips from the dashboard.
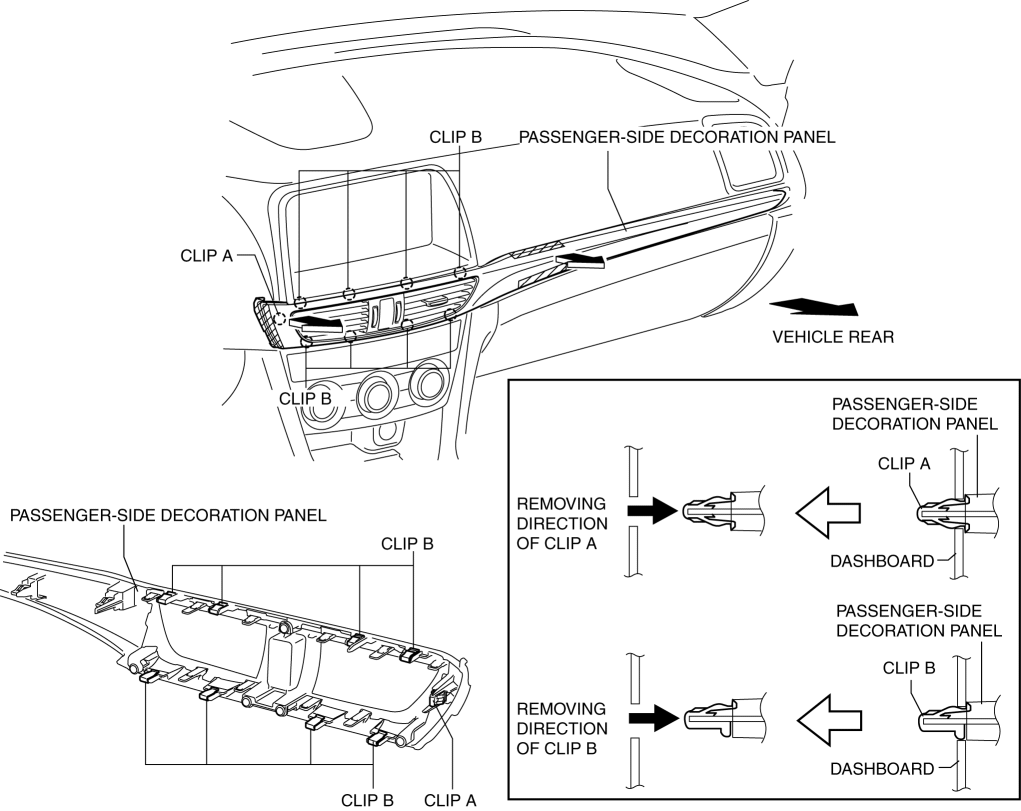
7. Hold the shaded area shown in the figure using your hands, and while pulling the passenger-side decoration panel straight in the direction of arrow shown in the figure (vehicle rear), and detach clip A and clips B from dashboard.
CAUTION:
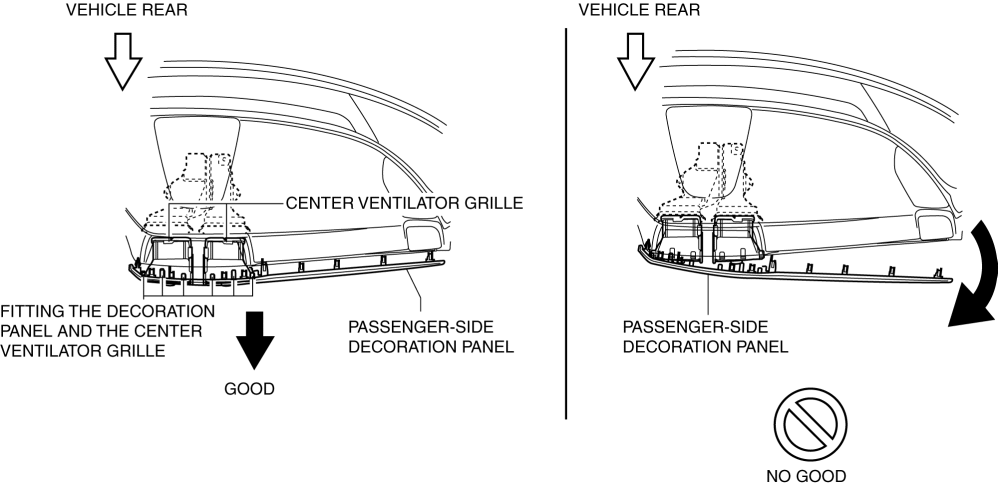
If the passenger-side decoration panel is removed at the wrong angle, the center ventilator grille may detach from the passenger-side decoration panel and the engagement area may be damaged. Remove the passenger-side decoration panel by pulling it straight to the vehicle rear.
NOTE:
After removing the passenger-side decoration panel, verify that the center ventilator grille is not detached. If the center ventilator grille is detached, install it to the passenger-side decoration panel.
8. Disconnect the hazard switch connector.
9. Remove the passenger-side decoration panel.
10. Install in the reverse order of removal.