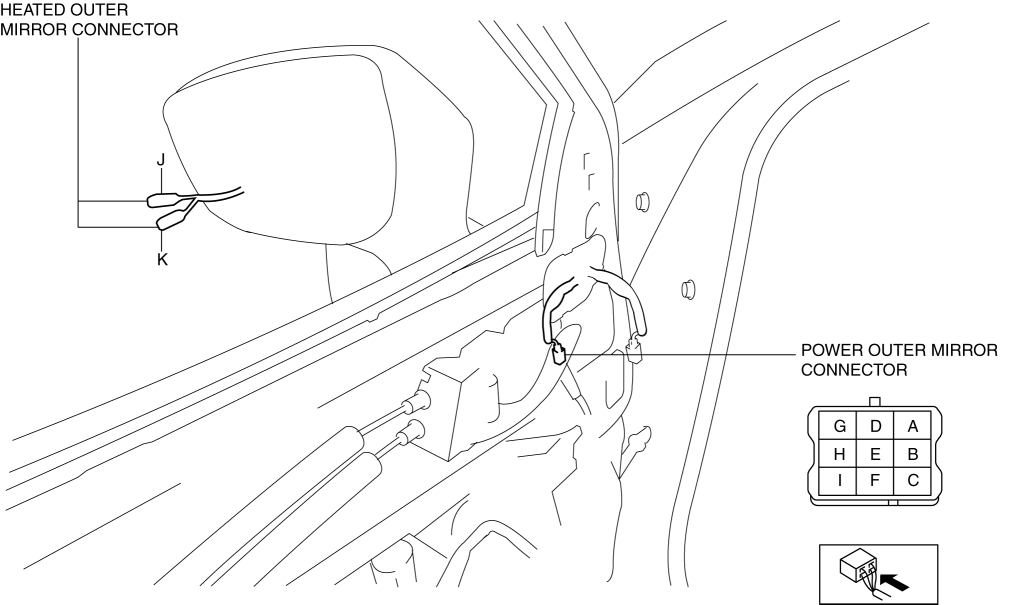
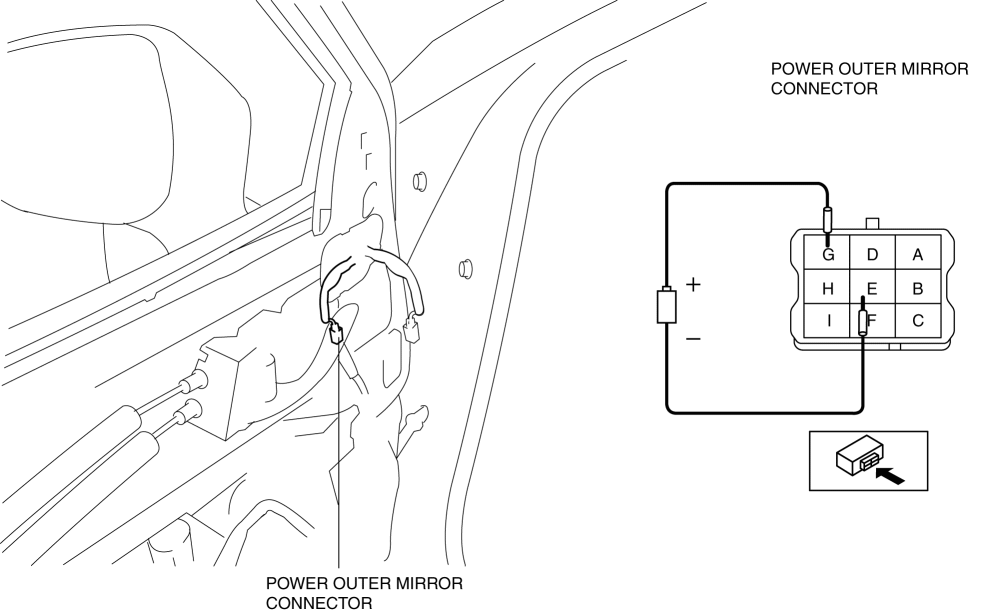
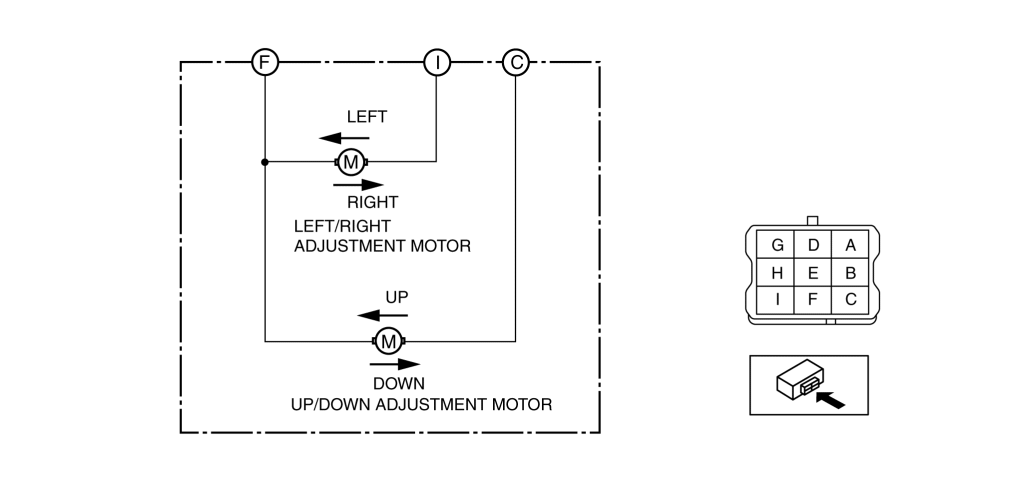
< Previous   Next >

2014 - Mazda6 - Body and Accessories

POWER OUTER MIRROR INSPECTION

Mirror Glass Adjustment

1. Disconnect the negative battery cable. (See NEGATIVE BATTERY CABLE DISCONNECTION/CONNECTION [SKYACTIV-G 2.5].)
2. Remove the following parts:
a. Inner garnish (See INNER GARNISH REMOVAL/INSTALLATION.)
b. Front door trim (See FRONT DOOR TRIM REMOVAL/INSTALLATION.)
c. Power outer mirror (See POWER OUTER MIRROR REMOVAL/INSTALLATION.)
3. Apply battery positive voltage and connect the ground to the power outer mirror terminals and inspect the power outer mirror operation.


Mirror operation direction

Battery positive voltage connect terminal

Ground connect terminal

Up

C

F

Down

F

C

Left

I

F

Right

F

I


Heated Outer Mirror Inspection

1. Disconnect the negative battery cable. (See NEGATIVE BATTERY CABLE DISCONNECTION/CONNECTION [SKYACTIV-G 2.5].)
2. Remove the following parts:
a. Inner garnish (See INNER GARNISH REMOVAL/INSTALLATION.)
b. Front door trim (See FRONT DOOR TRIM REMOVAL/INSTALLATION.)
c. Power outer mirror (See POWER OUTER MIRROR REMOVAL/INSTALLATION.)
d. Outer mirror glass (See OUTER MIRROR GLASS REMOVAL.) (See OUTER MIRROR GLASS INSTALLATION.)
3. Verify that the continuity between heated outer mirror connector terminals is as indicated in the table.

BSM Indicator Light Inspection

1. Disconnect the negative battery cable. (See NEGATIVE BATTERY CABLE DISCONNECTION/CONNECTION [SKYACTIV-G 2.5].)
2. Remove the following parts:
a. Inner garnish (See INNER GARNISH REMOVAL/INSTALLATION.)
b. Front door trim (See FRONT DOOR TRIM REMOVAL/INSTALLATION.)
c. Power outer mirror (See POWER OUTER MIRROR REMOVAL/INSTALLATION.)
d. Outer mirror glass (See OUTER MIRROR GLASS REMOVAL.) (See OUTER MIRROR GLASS INSTALLATION.)
3. Verify that the continuity between BSM indicator light connector terminals is as indicated in the table.

Auto-dimming Outer Mirror Inspection

1. Disconnect the negative battery cable. (See NEGATIVE BATTERY CABLE DISCONNECTION/CONNECTION [SKYACTIV-G 2.5].)
2. Remove the Inner garnish. (See INNER GARNISH REMOVAL/INSTALLATION.)
3. Remove the front door trim. (See FRONT DOOR TRIM REMOVAL/INSTALLATION.)
4. Disconnect the power outer mirror connector.
5. Connect the power outer mirror connector terminal G to a dry cell battery's plus (+) terminal (1.2 V) and terminal E to its minus terminal.

6. If there is any malfunction, inspect the outer mirror glass. (See OUTER MIRROR GLASS INSPECTION.)


< Previous   Next >
Back to Top
© 2012 Mazda North American Operations, U.S.A.