-
There are two types of PCM settings. If the incorrect PCM is installed, it could cause interference with engine control.
-
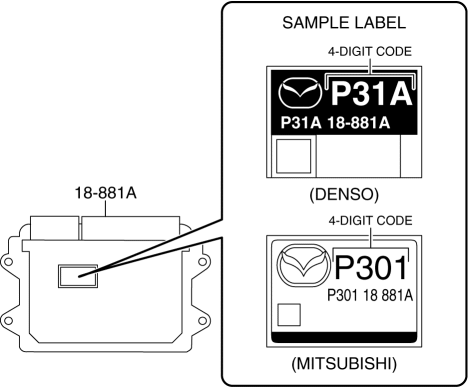
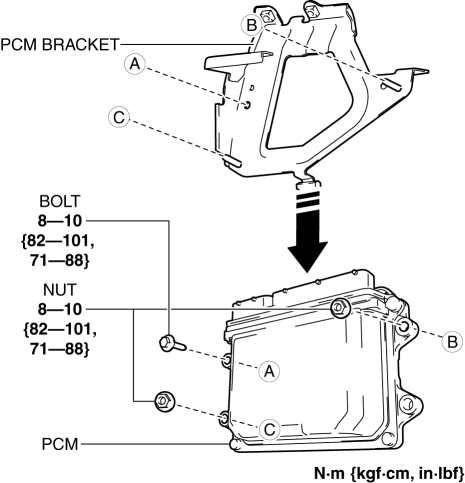
When replacing the PCM, verify the first four digits of the part number indicated on the PCM label before replacement, and replace the PCM with one having the same part number.
-
If configuration is not performed when the PCM is replaced with a new one, the vehicle specification information is not stored in the PCM and the system will not operate normally.
-
When performing configuration, it is necessary to read the vehicle specification information from the PCM before replacing it. Connect the M-MDS to the vehicle and perform vehicle identification before removing the PCM. The vehicle specification information is temporarily stored in the M-MDS.
